-
Photographer, vanishing America.
-
Photographer, homes at night.
-
"Nothing focuses the mind of the reporter like being asked to specify what exactly they’d like to see done, and it’s much easier for a developer to scan a list with actual tasks right in the sentence construction." Good advice for personal to-do lists too.
-
Fun way to browse full-size images from Google Image Search results.
hack
-
Getting the Google IDs of liking users is interesting, but I didn't know about "Reader's view of a feed", also interesting. [via kottke]
-
"To help you understand how Web Caches will treat a Web page, the Cacheability Engine will look at a URL (and optionally any images or objects associated with it), giving both specific cache-related data about it, and a general commentary on how cacheable the object is."
Post Google Reader Shared Items to Delicious
As you can probably tell if you read this site, I'm a fan of Delicious. I regularly bookmark sites, images, or files I've found on the Web at Delicious and add a note or summary. Half of my motivation is finding links I want to get back to and half is sharing the link with others. That's why I also auto-post my Delicious links here once a day and mark them with "gathered from delicious".
Over on the other side of the Web I use Google Reader to keep up with the world. So naturally I find a lot of interesting links there and want to post them to Delicious. 90% of time I just click to the original source and hit the Delicious Bookmark button in my browser if I want to post the link. But Google Reader has a feature similar to Delicious called Google Reader Shared Items. If there's something I know I want to share even without visiting the original source, I just click a button and it's shared with the world.
But what if I want to cross the streams? I already have something that imports links from Delicious to my blog, I like their service for searching links, and it seems like I should be able to easily bookmark within Google Reader for the 10% of links I share there. Well, of course Google doesn't offer that integration because they have a competing product. In that case: Greasemonkey to the rescue, no? Well, I tried every script that attempts to add a Delicious button to Google Reader and none of them worked. (I'm guessing Google is either actively thwarting these scripts, or the script authors don't have time to keep up with Google's HTML changes.) So it was time to roll my own. But I don't want to keep up with Google's changes either, so Greasemonkey is out. There had to be a better way.
Google offers the shared items as an ATOM feed which makes scripting them fairly easy. You can find your shared items feed by logging into Google Reader, clicking "shared items" in the top-left menu, click "at this webpage" in the shared items note, and then you'll find the URL at the "atom feed" link in the popup. (shew.) I decided to import my Google Reader shared items into Delicious with a Perl script I can run on a schedule. Since there are so many Greasemonkey scripts out there to do this kind of thing I thought it might be worth sharing:
greadertodelicious.pl (click for the source)
To use this script you'll need a couple of Perl modules: XML::Atom::Syndication for parsing the Google Reader feed and Net::Delicious for posting via the Delicious API. Once installed, edit the script to include your Google Reader shared items feed URL, Delicious user/pass, and then save the file as greadertodelicious.pl. Run the script every so often with
Here are a couple snags I hit. You can tag items at Google Reader, but unfortunately Google doesn't make your tags available in the shared items feed. For now I'm simply tagging imported items with "googlereader", and adding appropriate tags at Delicious. I also didn't want to import all of my older shared items, so in the script I set a start date with
Over on the other side of the Web I use Google Reader to keep up with the world. So naturally I find a lot of interesting links there and want to post them to Delicious. 90% of time I just click to the original source and hit the Delicious Bookmark button in my browser if I want to post the link. But Google Reader has a feature similar to Delicious called Google Reader Shared Items. If there's something I know I want to share even without visiting the original source, I just click a button and it's shared with the world.
But what if I want to cross the streams? I already have something that imports links from Delicious to my blog, I like their service for searching links, and it seems like I should be able to easily bookmark within Google Reader for the 10% of links I share there. Well, of course Google doesn't offer that integration because they have a competing product. In that case: Greasemonkey to the rescue, no? Well, I tried every script that attempts to add a Delicious button to Google Reader and none of them worked. (I'm guessing Google is either actively thwarting these scripts, or the script authors don't have time to keep up with Google's HTML changes.) So it was time to roll my own. But I don't want to keep up with Google's changes either, so Greasemonkey is out. There had to be a better way.
Google offers the shared items as an ATOM feed which makes scripting them fairly easy. You can find your shared items feed by logging into Google Reader, clicking "shared items" in the top-left menu, click "at this webpage" in the shared items note, and then you'll find the URL at the "atom feed" link in the popup. (shew.) I decided to import my Google Reader shared items into Delicious with a Perl script I can run on a schedule. Since there are so many Greasemonkey scripts out there to do this kind of thing I thought it might be worth sharing:
greadertodelicious.pl (click for the source)
To use this script you'll need a couple of Perl modules: XML::Atom::Syndication for parsing the Google Reader feed and Net::Delicious for posting via the Delicious API. Once installed, edit the script to include your Google Reader shared items feed URL, Delicious user/pass, and then save the file as greadertodelicious.pl. Run the script every so often with
cron, and your Google Reader shared items should start showing up at Delicious.
Here are a couple snags I hit. You can tag items at Google Reader, but unfortunately Google doesn't make your tags available in the shared items feed. For now I'm simply tagging imported items with "googlereader", and adding appropriate tags at Delicious. I also didn't want to import all of my older shared items, so in the script I set a start date with
timelocal() and compare it with each shared item's cryptically labeled crawl-timestamp-msec—as it turns out that's the time the item was shared as a Unix-ish timestamp. If the item was shared before the start date set in the script, it's not posted to Delicious.-
Yet another site you can ping when you update your blog. This one's for Google's Blog Search. Ping!
-
Nice tutorial that shows how you can saturate the colors in a photo by switching to Lab Color mode and messing with the channels. [via nelson]
-
search for code in specific languages (except VB?) from across the web.
-
lectures from UC Berkeley classes online. [via Searchblog]
Add Borders to Flickr Images
Flickr's recent move from beta to gamma introduced a slew of changes to the look and feel of the site. Most of the changes seemed to be centered around navigation, and finding ways to give quick access to all of Flickr's features. All well and good.
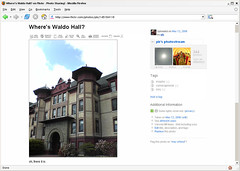
However, there was one fundamental design change in the upgrade that affects every image you view on Flickr—they removed photo borders. Flickr used to display a 1-pixel wide gray border around every photo, both on photo detail pages, and on photostream pages. This border was important because it separated the photograph from the background. The effect is subtle most of the time, but has a big impact with certain photos. Here's an example:

This photo of mine on Flickr has white at the edges, and without the border the photo bleeds into the background. Obviously you can imagine where the photo ends and page begins by drawing a mental line from the colored parts of the photo through the white parts of the photo. But the gray border used to do that work for you, and in the process made the site feel more solid.
Luckily, because I use Firefox, I can change the look of Flickr with a few lines of CSS. I put the gray border back on both image detail pages and photostream pages, and I'm already more productive thanks to eliminating the mental strain of imagining borders around photos. If you'd like to give your brain a little less work while browsing Flickr, here's how it's done:
I think light gray (#999) is the best color for the border, but you can make it lighter or darker by adjusting the value lighter (#ccc) or darker (#666). You might also experiment with padding and background colors if you want to mimic the white/gray borders I often use for photos here.
If you're not already obsessing over details like this, try tuning in to photo borders at other sites and in photo applications. Of course you're not supposed to notice the border (or lack thereof). But like any physical frame, pixel borders can enhance or detract from your photographs.
Update: After living with this for a day or two, I decided to go with a lighter gray border, #ccc. Just change #999 to #ccc in the CSS above if you'd like to do the same.
However, there was one fundamental design change in the upgrade that affects every image you view on Flickr—they removed photo borders. Flickr used to display a 1-pixel wide gray border around every photo, both on photo detail pages, and on photostream pages. This border was important because it separated the photograph from the background. The effect is subtle most of the time, but has a big impact with certain photos. Here's an example:
This photo of mine on Flickr has white at the edges, and without the border the photo bleeds into the background. Obviously you can imagine where the photo ends and page begins by drawing a mental line from the colored parts of the photo through the white parts of the photo. But the gray border used to do that work for you, and in the process made the site feel more solid.
Luckily, because I use Firefox, I can change the look of Flickr with a few lines of CSS. I put the gray border back on both image detail pages and photostream pages, and I'm already more productive thanks to eliminating the mental strain of imagining borders around photos. If you'd like to give your brain a little less work while browsing Flickr, here's how it's done:
- Locate your Firefox profile folder.
- Open the chrome folder and open the file userContent.css in a text editor like Notepad. (You might have to create the file if it doesn't exist yet.)
- Add the following bit of CSS to the file:
@-moz-document domain(flickr.com) { .reflect { border:solid #999 1px !important; } .Photo img { border:solid #999 1px !important; } } - Save userContent.css and restart Firefox.
I think light gray (#999) is the best color for the border, but you can make it lighter or darker by adjusting the value lighter (#ccc) or darker (#666). You might also experiment with padding and background colors if you want to mimic the white/gray borders I often use for photos here.
If you're not already obsessing over details like this, try tuning in to photo borders at other sites and in photo applications. Of course you're not supposed to notice the border (or lack thereof). But like any physical frame, pixel borders can enhance or detract from your photographs.
Update: After living with this for a day or two, I decided to go with a lighter gray border, #ccc. Just change #999 to #ccc in the CSS above if you'd like to do the same.